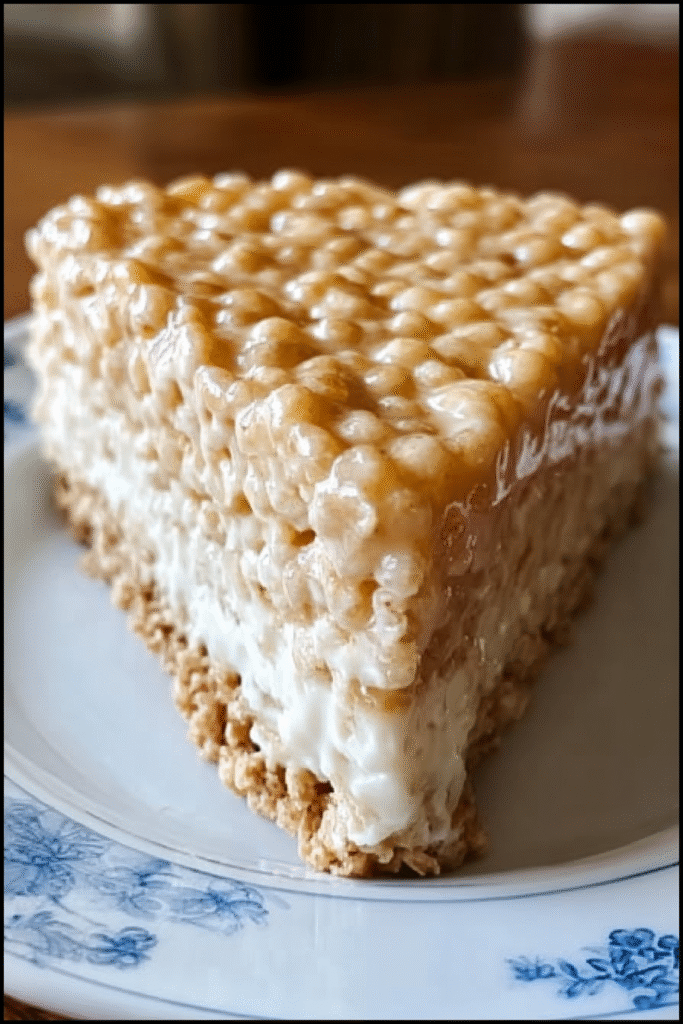
These No-Bake Cheesecake Rice Krispy Treats combine crispy, chewy marshmallow cereal base with smooth cream cheese layer for an indulgent fusion of two classic desserts requiring no oven. The recipe builds layers through traditional Rice Krispy treat preparation topped with sweetened cream cheese mixture lightened with whipped topping. The technique uses simple melting, mixing, and spreading methods accessible to all skill levels including children. The result delivers crunchy-creamy contrast with nostalgic cereal treat base and decadent cheesecake-inspired topping perfect for parties, potlucks, or satisfying sweet cravings.
Why You’ll Love This Recipe
No-Bake Convenience – Eliminates oven use entirely; just mix, press, chill, and serve for effortless dessert preparation.
Two Desserts in One – Merges beloved Rice Krispy treat texture with creamy cheesecake flavor in single innovative treat.
Kid-Friendly Assembly – Simple steps make this perfect for cooking with children or delegating to young helpers.
Highly Customizable – Endless topping options from fresh fruit to chocolate drizzle allow creative personalization.
Make-Ahead Advantage – Prepare hours or days in advance with excellent refrigerator stability for stress-free entertaining.
Quick Preparation – Active time under 20 minutes with chilling period doing the work for you.
Ingredients You’ll Need
For the Cereal Base:
- 6 cups Rice Krispies cereal – provides signature crispy texture and nostalgic base
- ¼ cup unsalted butter – binds marshmallow mixture and adds richness
- 1 (10 oz) package mini marshmallows (about 40-45 marshmallows) – creates chewy, sweet binding agent
For the Cheesecake Layer:
- 8 oz cream cheese, softened to room temperature – forms rich, tangy base for cheesecake layer
- ½ cup powdered sugar – sweetens cream cheese without granular texture
- 1 teaspoon vanilla extract – enhances overall sweetness and adds depth
- ½ cup whipped topping (like Cool Whip), thawed – lightens cream cheese mixture and adds airy texture
Optional Toppings:
- Graham cracker crumbs – creates authentic cheesecake crust effect on top
- Fresh berries – adds color, freshness, and fruity contrast
- Chocolate drizzle – provides rich chocolate accent and visual appeal
- Sprinkles – creates festive appearance for parties and celebrations
Step-by-Step Instructions
Make Cereal Base
In large microwave-safe bowl, melt butter in microwave for 30-45 seconds until completely liquid. Add mini marshmallows to melted butter and stir until smooth. If marshmallows don’t melt completely, microwave in 15-second intervals, stirring between each, until fully melted and mixture is uniform.
Combine with Cereal
Add Rice Krispies cereal to marshmallow mixture and stir vigorously until every piece is evenly coated with sticky marshmallow. Work quickly before mixture cools and becomes difficult to mix.
Press into Pan
Line 9×9-inch square pan with parchment paper for easy removal. Transfer cereal mixture to pan and press firmly using greased spatula or lightly buttered hands, creating even layer that reaches corners. Set aside to cool slightly while preparing cheesecake layer.
Beat Cream Cheese
In mixing bowl, beat softened cream cheese with hand mixer on medium speed for 2-3 minutes until smooth, creamy, and completely lump-free. Proper softening is crucial for achieving silky texture.
Add Sugar and Vanilla
Add powdered sugar and vanilla extract to cream cheese. Beat on medium speed until well combined and mixture is fluffy, about 1-2 minutes. Scrape bowl sides as needed for even mixing.
Fold in Whipped Topping
Using rubber spatula, gently fold thawed whipped topping into cream cheese mixture until completely incorporated and mixture is light, fluffy, and uniform in color. Folding rather than beating maintains airy texture.
Spread Cheesecake Layer
Spread cheesecake mixture evenly over cooled cereal base using offset spatula or back of spoon, smoothing to create uniform layer that covers completely to edges.
Add Toppings
Sprinkle graham cracker crumbs over entire surface to mimic traditional cheesecake crust. Add optional fresh berries, chocolate drizzle, or sprinkles for extra decoration and flavor.
Chill to Set
Refrigerate assembled treats for at least 1-2 hours to allow cheesecake layer to set properly and flavors to meld. Chilling is essential for clean cutting.
Cut and Serve
Once chilled, lift entire treat block from pan using parchment paper edges. Transfer to cutting board and cut into 16-20 squares using sharp knife, wiping blade between cuts for cleanest edges. Serve chilled or at room temperature.
Recipe Notes & Tips
Butter Hands for Pressing – Use lightly buttered hands or greased spatula to press cereal base without sticking; mixture is very sticky when warm.
Room Temperature Cream Cheese Essential – Completely softened cream cheese is crucial for smooth, lump-free cheesecake layer; cold cream cheese creates chunks.
Work Quickly – Marshmallow mixture firms as it cools; work efficiently when mixing cereal and pressing into pan.
Graham Cracker Enhancement – Mix graham cracker crumbs into cereal base for extra flavor throughout, not just on top.
Parchment Paper Critical – Lining pan with parchment allows easy removal and clean cutting without damaging treats.
Chilling Time Non-Negotiable – Full 1-2 hours ensures cheesecake layer sets properly; rushing creates messy, soft topping.
Nutritional Information
Prep Time: 15 minutes
Chilling Time: 1-2 hours
Total Time: Approximately 2 hours 15 minutes
Servings: 16-20 treats
Calories per serving: Approximately 150 kcal per treat (based on 20 pieces)
Protein: 2g | Carbohydrates: 20g | Fat: 7g | Fiber: 0g
Perfect Pairings
Coffee or Tea – Warm beverages balance sweetness and provide comforting pairing for dessert treats.
Cold Milk – Classic combination provides nostalgic experience and cuts through rich cream cheese layer.
Fresh Fruit Salad – Light, refreshing fruit offers healthy contrast to sweet, rich treats.
Hot Chocolate – Rich cocoa pairs beautifully during colder months for indulgent dessert experience.
Ideal Occasions
Children’s Parties – Kid-friendly flavors and easy individual servings make these perfect for birthday celebrations.
School Events – No-bake preparation and nut-free option (if careful with toppings) suit classroom treats.
Potluck Contributions – Portable, pre-cut squares travel well and appeal to diverse age groups.
Quick Dessert Solution – Minimal effort and common ingredients make this ideal for last-minute sweet needs.
Storage & Serving Tips
Refrigerator Storage – Store in airtight container in refrigerator up to 3-4 days; keep chilled to maintain cheesecake layer texture.
Freezing Instructions – Wrap individual treats in plastic wrap and freeze up to 1 month; thaw in refrigerator before serving.
Serving Temperature – Serve chilled for firmest texture or at room temperature for softer, chewier cereal base.
Parchment Separation – Layer treats with parchment paper in storage container to prevent sticking together.
Creative Variations to Try
Chocolate Addition – Mix mini chocolate chips into cereal base or drizzle melted chocolate over cheesecake layer.
Berry Cheesecake Version – Swirl berry preserves into cream cheese layer before spreading for fruit-flavored variation.
Lemon Twist – Add lemon zest and juice to cheesecake layer for tangy, citrus-forward flavor profile.
Peanut Butter Option – Swirl peanut butter into marshmallow mixture or cheesecake layer for nutty richness.
Troubleshooting Common Issues
Hard, Difficult-to-Cut Base – Too much pressure when pressing or over-chilling; press gently and cut after minimum chill time.
Lumpy Cheesecake Layer – Cream cheese too cold when mixing; ensure complete room temperature softening before beating.
Cereal Base Won’t Hold Together – Insufficient marshmallow coating or not pressed firmly enough; ensure thorough mixing and firm pressing.
Soft, Runny Topping – Inadequate chilling time or too much whipped topping; refrigerate full 2 hours minimum and measure accurately.
Why This Recipe Works
These no-bake cheesecake Rice Krispy treats succeed because the melted marshmallow creates sugar-based adhesive that coats cereal pieces and binds them into cohesive layer when cooled. The butter adds fat that prevents marshmallow from becoming too sticky and contributes flavor. The cream cheese layer mimics traditional cheesecake filling through combination of tangy cream cheese, sweet powdered sugar, and airy whipped topping that lightens dense cheese while adding stability. The refrigeration period allows marshmallow base to firm completely while cream cheese layer sets through cold temperature rather than baking, creating sliceable structure. The graham cracker crumb topping provides textural contrast and reinforces cheesecake identity through familiar flavor association. At approximately 150 calories per treat when cut into 20 pieces, this represents moderate dessert portion with balanced carbohydrates from cereal and sugar, fat from butter and cream cheese, though minimal protein or fiber makes this pure indulgence rather than nutritious snack.
Final Thoughts
This recipe brilliantly fuses two beloved American desserts—Rice Krispy treats and cheesecake—into accessible no-bake format that requires minimal cooking skills yet delivers impressive results. The elimination of oven use makes this practical for hot weather, small kitchens, or situations where oven access is limited, while the kid-friendly preparation process creates opportunity for family cooking activities. At 150 calories per piece, this provides moderate treat portion when cut into 20 squares, though larger cuts increase calorie content accordingly. The make-ahead capability with 3-4 day refrigeration stability makes this excellent for party planning, allowing preparation days in advance without quality degradation. The customization options through various toppings—fresh fruit for healthier approach, chocolate for indulgence, or sprinkles for festive appearance—allow adaptation to different occasions and preferences. For slightly lighter version, use reduced-fat cream cheese and light whipped topping to cut approximately 25-30 calories per serving while maintaining acceptable texture and flavor. The recipe’s reliance on common ingredients like Rice Krispies, marshmallows, and cream cheese means most cooks can prepare this without special shopping, making it practical emergency dessert option. The nostalgic cereal treat base appeals across generations while the cheesecake layer adds sophistication that elevates this beyond simple children’s snack into legitimate dessert appropriate for mixed-age gatherings.